
If you’ve ever wanted to add a soft, dreamy bubble effect to your colouring pages, you’re in the right place! In this step-by-step tutorial I’ll show you exactly how to colour bubbles using pastel alcohol markers and a white pen — it’s surprisingly easy and gives your pages a beautiful, light-filled look.

Here’s the finished page, which I coloured in one of my favourite books — Girl Moments by Coco Wyo. You might also recognise it from my how to colour tiles tutorial — I used the same page to create both effects!
For this look I used the Ohuhu pastel alcohol markers along with a colourless blender to help soften everything out. I also used the uni-ball white gel pen for those bright, shiny highlights that make the bubbles really pop.
Before we dive in — if you love adult colouring, make sure you grab my free printable colouring pages. Thousands of colouring fans already enjoy them, and you’ll get plenty more tutorials and tips too!
Free download
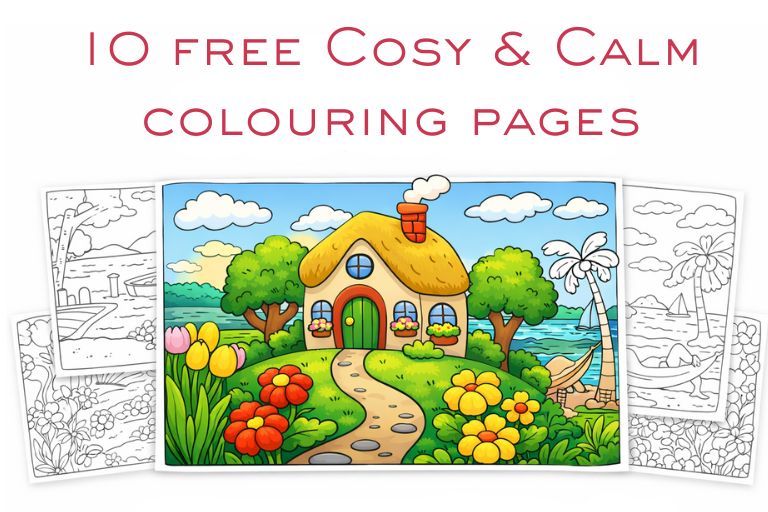
Get 10 free cosy & calm colouring pages
Pop your details in and I’ll email them straight over. Perfect for a quick wind-down session.
- 10 printable pages (cosy, calm vibes)
- Instant access via email
- Unsubscribe anytime
What You’ll Need
To create bubbles in your adult colouring books you will need:

3 alcohol marker shades – I really like this combo of yellow, blue and pink for my bubble effects.
A colourless blender – you may have one from any alcohol marker sets you have but if not you can easily grab some on Amazon.

You will also need a white gel men. I love my Gelly Roll pens but decided to use my uni-ball Singo for this.
Girl Moments by Coco Wyo Colouring Book
If you’ve read any of my adult colouring content before then you will know that this is currently my favourite colouring in book. You can actually see my completed Girl Moments pages here if you want some inspiration.
It features 40 scenes of daily life in a cute and comfy style.
Instructions

The first thing I want to mention is that I like to have my markers uncapped and ready to go. That’s because you have to work quickly so you don’t want to waste time capping and uncapping them over and over. Obviously if you stop for an extended amount of time place the caps back on to prevent them drying out.

To start use your colourless blender to make a circle shape and colour it in. Be careful going over the black printed lines – I wasn’t too careful and ended up with the black ink bleeding.

Then dab on your three colours. I tried to keep mine in the same pattern throughout with blue to the left, yellow on the bottom and pink to the top.

Now get your colourless blender again and you are going to blend blend blend the three colours. They’re a little dark here because of me going over the black lines. Don’t be like me!

Once you’ve got the hang of it then you can move on to making a few circles at a time – I usually do three at a time. Use your colourless blender to make the circles, add your three shades and then blend blend blend.

Keep repeating this.

Until your area is full of bubbles.

Now let’s define each bubble by drawing around it with your white gel pen. I usually need to do this 3 – 5 times (all at once, you don’t need to wait for layers to dry) to really make them stand out.
This step is what really transforms a soft circle into a shiny, floaty bubble. Don’t skip it — the white pen makes all the difference.

Once you’ve drawn all your circles you can add in a little curved line to each bubble as a highlight.
Here you can see how it looks in my completed picture. For this one I also used a wood grain effect on the floor as well as shaded tiles – you can see my shaded tiles tutorial here.
FAQ: Bubble Colouring Technique
Do I need a colourless blender to colour bubbles?
Yes — a colourless blender is absolutely essential for this effect. It helps soften and spread the colours without overpowering the white space, which gives your bubbles that transparent, airy look. I used the Ohuhu colourless blender and wouldn’t attempt this technique without it!
Can I use coloured pencils instead of markers?
You can! Coloured pencils give a more subtle look, but they still work well. Just make sure to leave plenty of white space, and use a white pencil or gel pen to add highlights.
What colours work best for colouring bubbles?
Stick to pale tones — pastel blues, pinks, yellows, lavender, and even mint green. You want soft, barely-there colour that blends out into transparency.
How do I draw my own bubbles?
If your colouring page doesn’t already have bubbles, you can draw your own using a light pencil or fineliner. Vary the sizes slightly and space them out unevenly for a natural, playful look.
Where can I practise this effect?
I used a page from Girl Moments by Coco Wyo, which has loads of cute, gentle scenes that work perfectly for effects like bubbles. You can get it here on Amazon, or just practise on blank paper until you feel confident.
Do I need a white gel pen for this technique?
Yes — the white gel pen is what gives the bubble its shine and dimension. I used the uni-ball Signo for these and it glides on smoothly even over marker. It’s the final detail that really brings your bubbles to life.
Show Me Yours!
I’d love to see how your bubbles turn out! Tag me on Instagram — I’m @officialmrspinch.
Get a Printable Version of This Tutorial
Want to take this tutorial offline while you colour? Pop your email below and I’ll send you a free PDF version to download.

More Adult Colouring Tutorials
If you liked this tutorial be sure to check out:
- How to colour a sticker effect from In The Playroom
- How to colour a terrazzo floor effect
- How to colour tiles
Colouring Books I Love
- Girl Moments by Coco Wyo (see my completed pages here)
- Cozy Santorini Dreams
- Cozy Europe Dreams
- Little Cuddles by Coco Wyo
- Cottage Dreams
- How To Draw Patterns by Coco Wyo
Colouring Supplies That I Love
- Ohuhu pastel alcohol markers
- Decotime alcohol markers (read my review here)
- Gelly Roll white gel pens
- Pastel acrylic markers (read my review here)
- Colourless blender
Free Colouring Pages
- Easter colouring pages
- Rabbit colouring pages
- Princess kitten colouring pages from In The Playroom

